Serves: n/a
Cost: ~€4.80+
Preparation and cooking time: ~20 minutes + 24 hours
Calories: ~60 per piece
The wonderful Nami, from JustOneCookbook published a delightful recipe last year for Valentine’s Day which brought so many memories flooding back to me. I vowed to make this chocolatey goodness, but as is often the case – time passed and I forgot all about my plans, until she mentioned it again this year prior to February the 14th. The recipe I’m talking about is Nama Chocolate, often sold in Japan under the ROYCE’ brand. I have eaten this before (in abundance) on previous visits to Japan but it never occurred to me to try to make itself so I must heartily thank Nami for opening my eyes! I’m a big fan of messing about with recipes but I wanted to make some nama chocolate for my wife this year and I didn’t want it to go wrong so I stuck fairly rigidly to her recipe the first time around. There are no words which can adequately describe just how good it was. So good that I’m already planning on giving it to people as Christmas presents this year. So good that I’d rather eat it than some chocolate from a local chocolaterie here. So good that I think this smooth, truffle-like chocolate might have spoiled me for other chocolates for evermore!
The only caveat to making great nama chocolate is that you have to use good chocolate. Nami mentions using at least 70% cacao chocolate. I must admit I don’t agree entirely with this point. The most important thing is that the chocolate tastes good. Since nama chocolate has, at its heart, only two ingredients – cream and chocolate – you’ve got to be pretty darn certain that the chocolate tastes fantastic. Whether you decide to use plain chocolate, milk chocolate, white chocolate, or a blend of the three, don’t skimp on the quality. I vaguely recall hearing from a chef once during a cooking course I did that she recommended using a chocolate with a cacao content of ~58-65% as this is considered the optimum content for cooking and melting and will yield the best results. This cooking course was a couple of years ago though, so I could have completely forgotten what she said and besides – it’s a minor point. Use a chocolate you like and you won’t be disappointed!
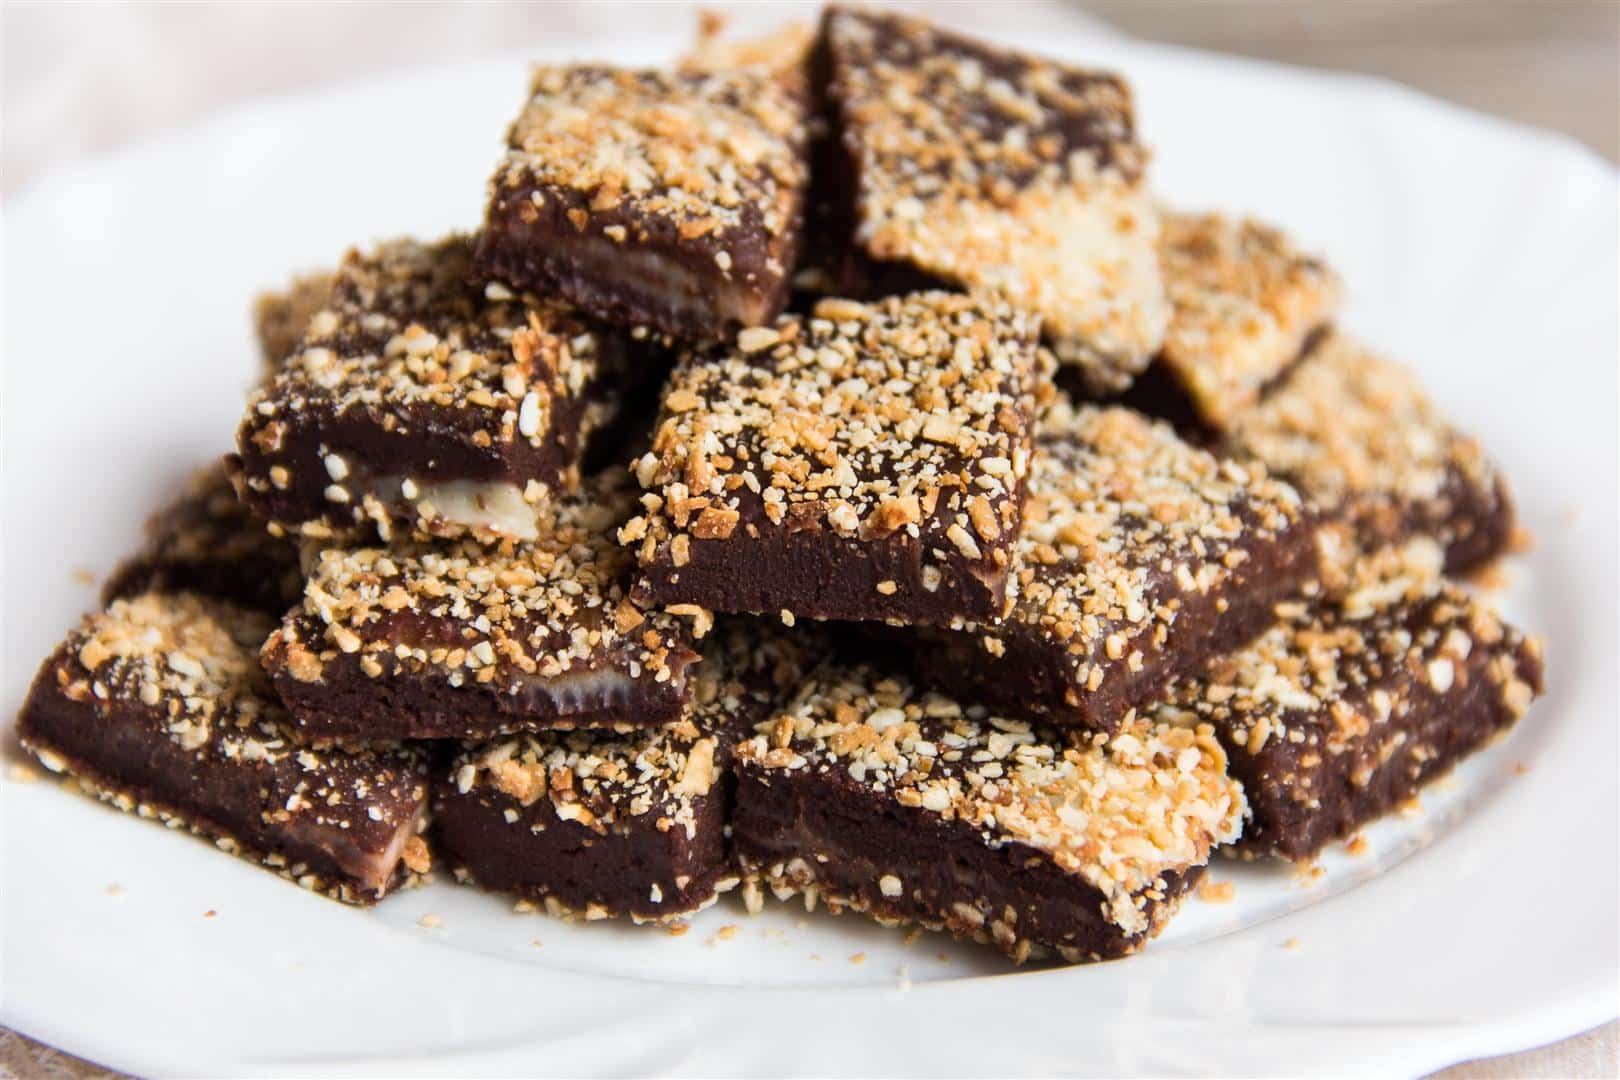
The great thing about nama chocolate is how easy it is to customise. Change the chocolate, change the alcohol (or remove it entirely), dust it with cocoa, dust it with coconut, add chopped nuts, add crushed biscuit… you can really find a combination which works for you! So how did this batch turn out? Well – I need to work on my chocolate swirling skills but the flavour was spot on and just what I was aiming for. A faint hint of the coconut liquor and the slightly coarse texture from the toasted coconut surrounding the velvety chocolate. As for the chocolate – I made one batch of plain chocolate and half a batch of white chocolate to swirl in.
From my experiences with my triple chocolate truffle torte I knew that white chocolate was a real pain to work with. It won’t set the same as “real” chocolate so accordingly I significantly increased the amount of chocolate used compared to the cream. The end result was satisfying enough – it wasn’t quite as solid as I would have hoped, but at least it didn’t ooze everywhere! I have increased the chocolate even more in the final recipe below, but if you’re at all concerned about working with it then I would recommend skipping the white chocolate completely and working purely with plain or milk chocolate which will yield much more consistent results (and of course I heartily recommend trying the original recipe from Nami’s wonderful site too before you start experimenting so you can see what you’ve been missing out on!).
Thanks again to Nami for her wonderful inspiration for, no doubt, many years of wonderful Christmas gifts and delicious, sweet treats! Have a wonderful day everyone – I’ll be back soon with something for all you meat-lovers, as well as the results and next round of my little on-going competition.
Coconut Rum-flavoured Nama Chocolate
[learn_more caption=”Video Recipe” state=”open”]

Ingredients
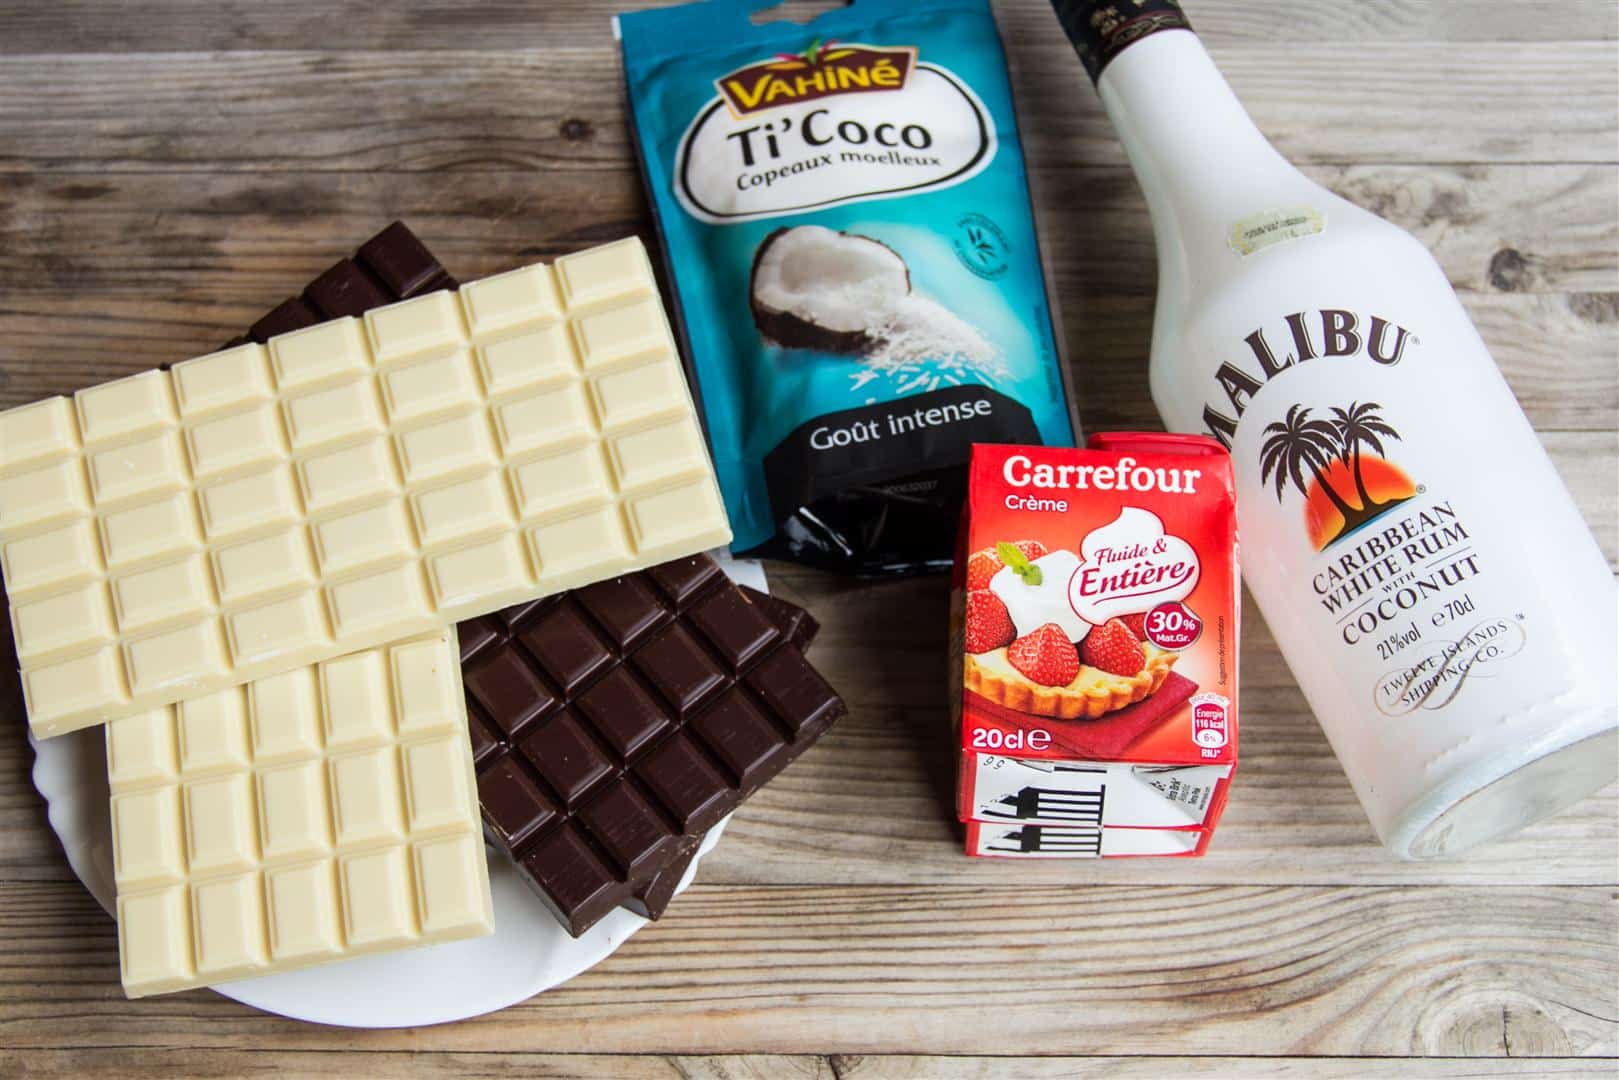
- 400g good quality Plain Chocolate
- 300g good quality White Chocolate
- 300ml Cream
- 2tbsps Coconut Rum
- ~125g Shredded Coconut
Instructions
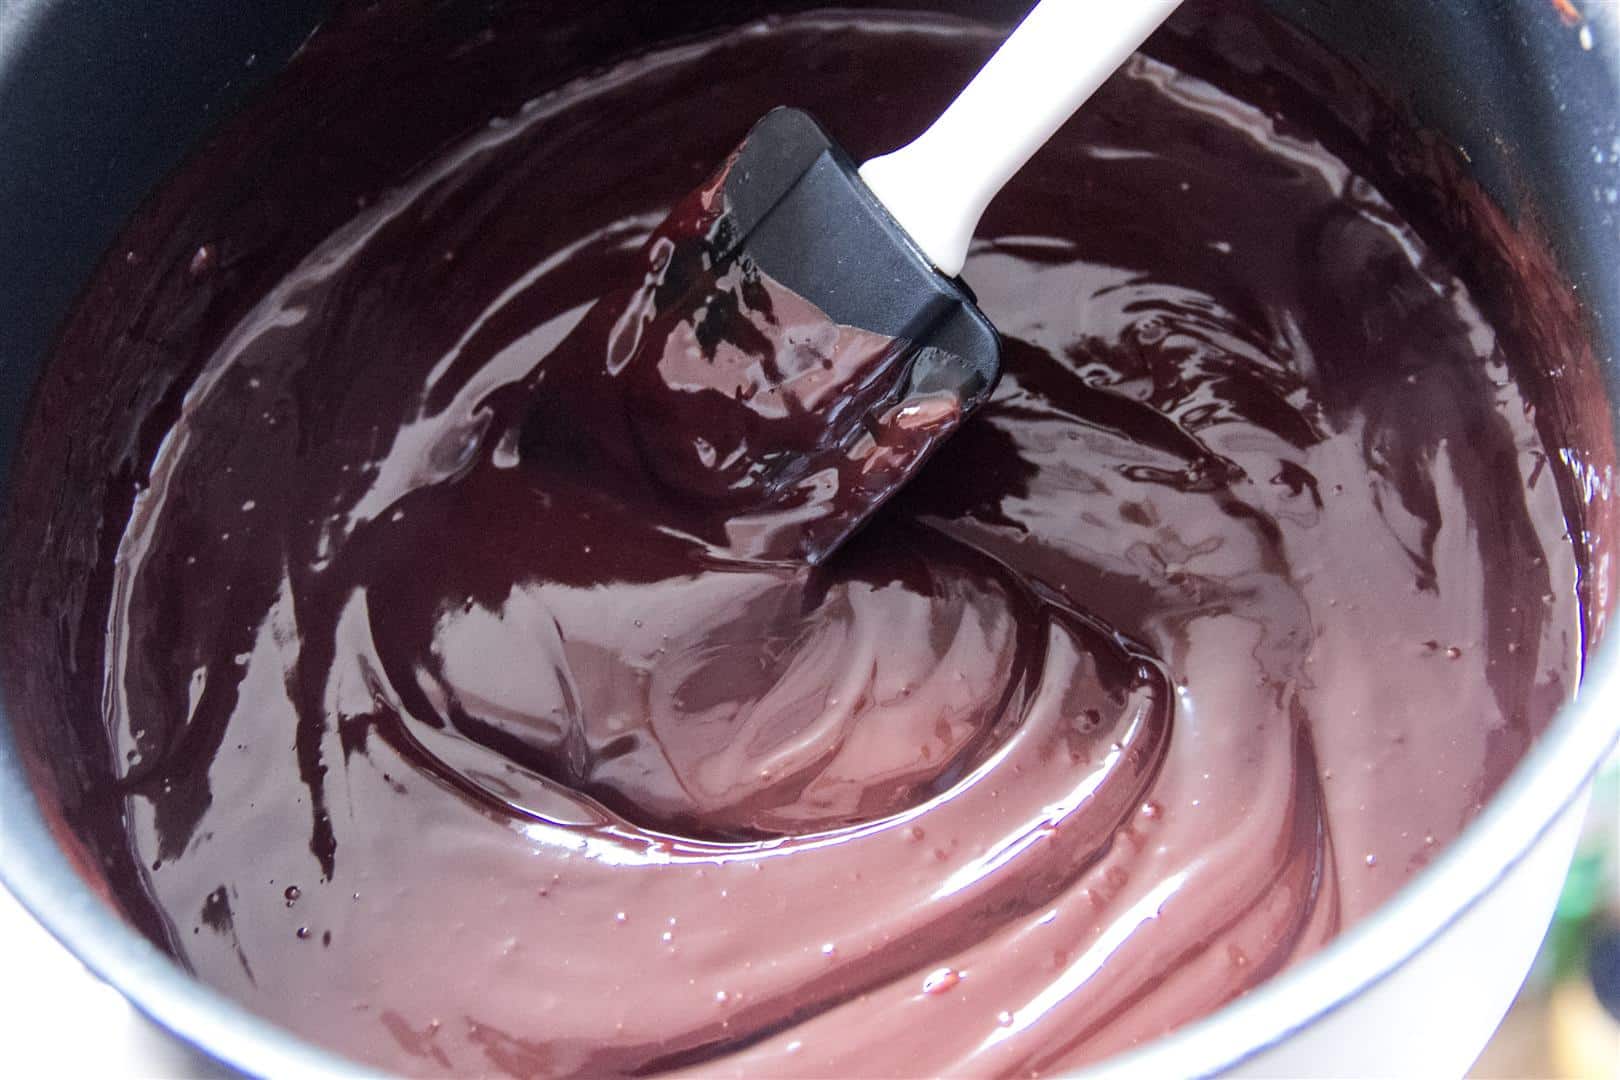
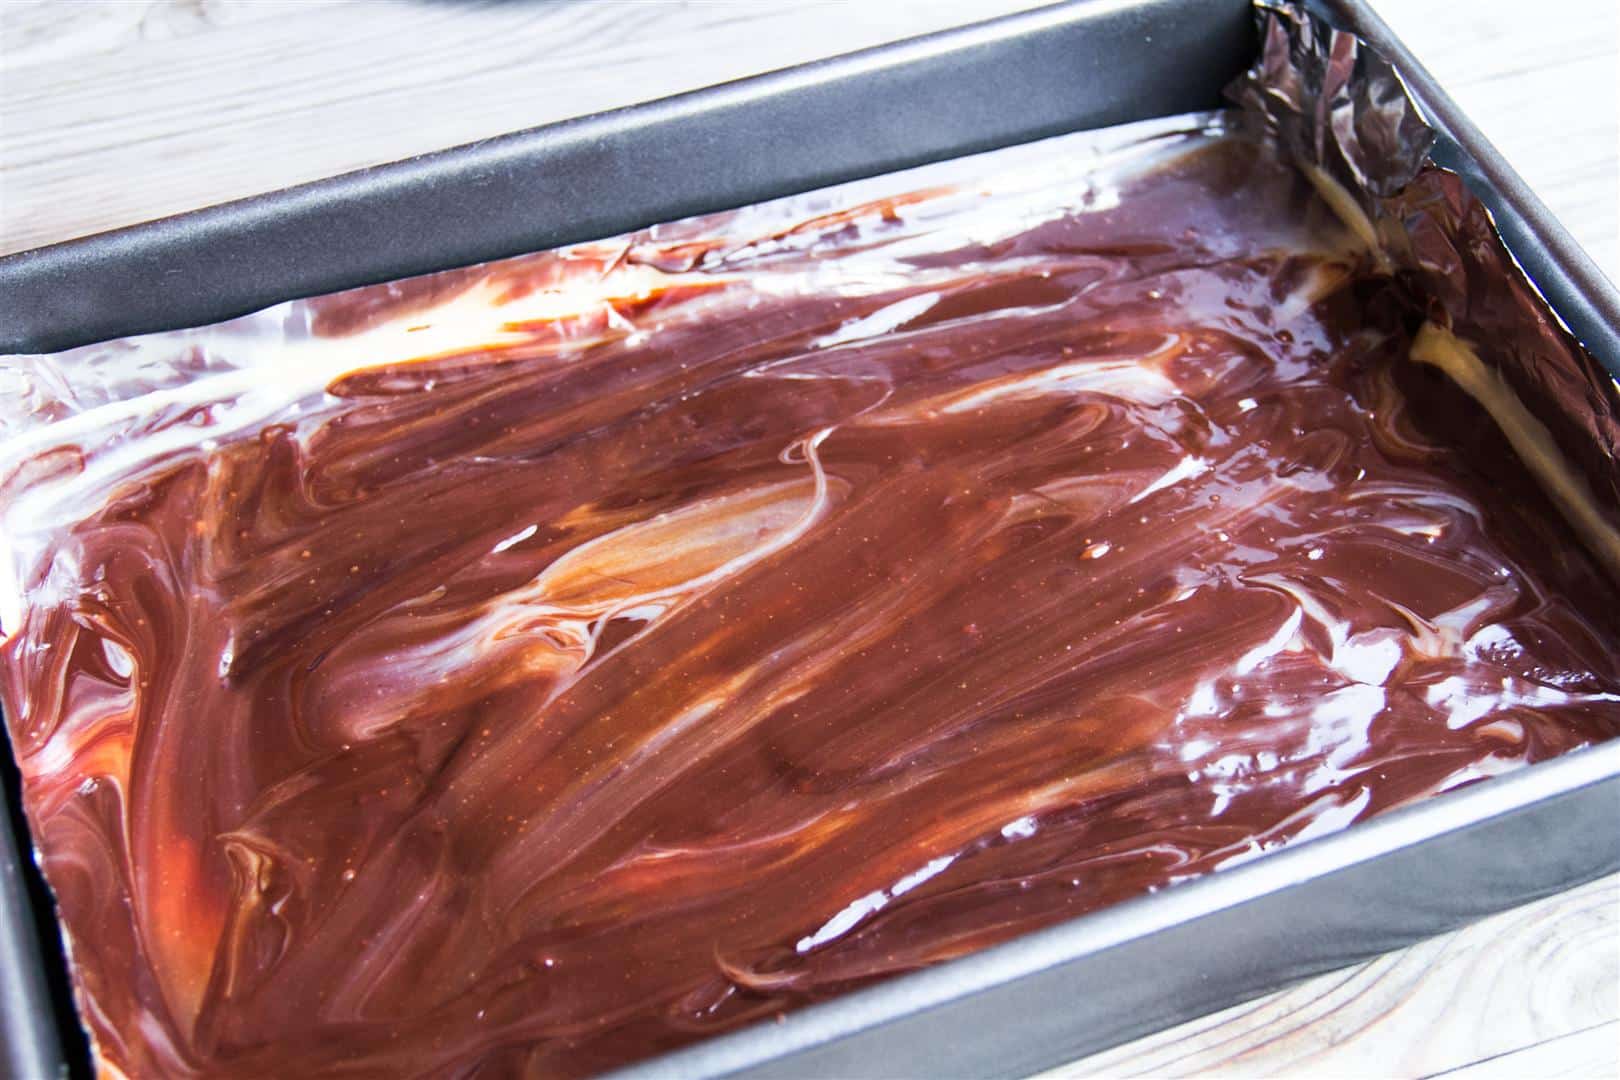
- Start off by lining a suitably sized tray with baking paper. I used a large brownie pan – about 30cm x 20cm. I didn’t have baking paper either so I used aluminium foil, although you can equally use cling-film. Break the plain chocolate into squares and pour 200ml of the cream into a pan. Set onto a medium heat and heat through until just before it begins to boil. Remove from the heat and place the chocolate into the hot cream. Stir until completely molten, being sure that no lumps remain. Finally, pour in the coconut rum and mix well until the rum is completely combined into the chocolate. Pour the chocolate into the prepared tin.

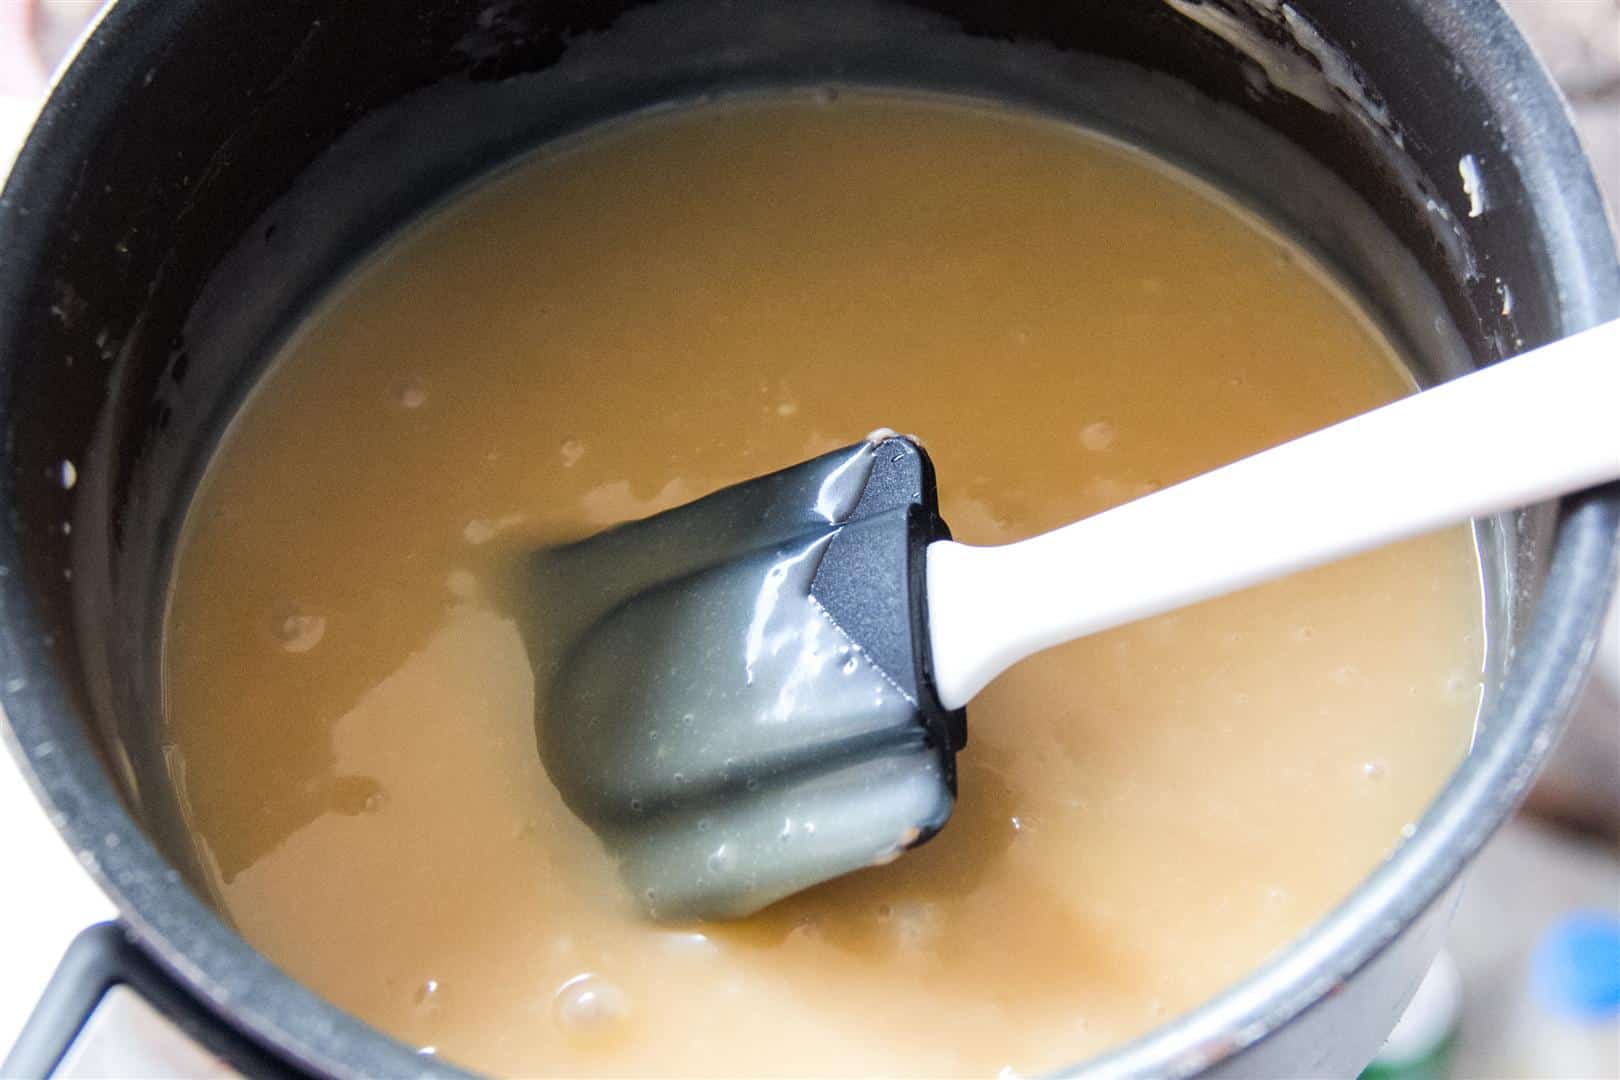
- Wash and dry the pan and then heat the remaining 100ml of cream until just before boiling again. While the cream is heating, break up the white chocolate into pieces and when the cream is ready place the chocolate inside and, once again, stir until completely smooth and molten. Pour on top of the plain chocolate in the pan.
- Stir the mixture around to create a swirl patten using a wooden spatula or similar implement. Smooth out the surface of the mixture and then cover and place into the refrigerator to finish setting overnight.
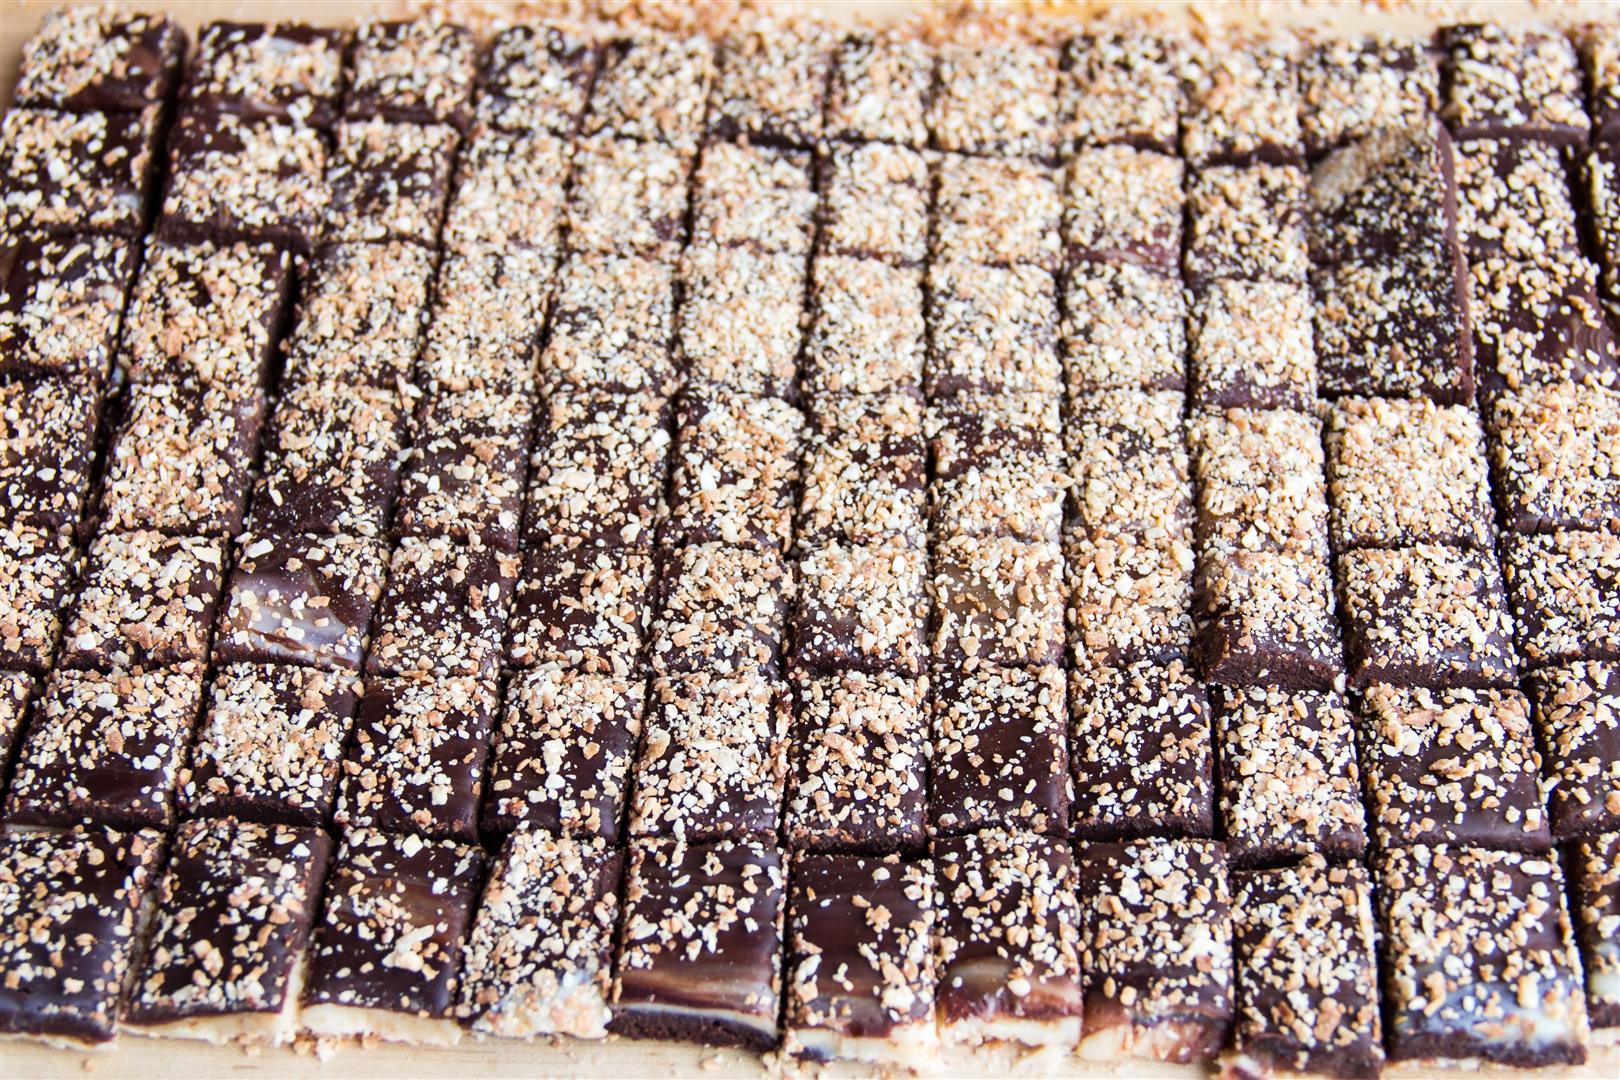
- Once the chocolate has firmed up toast the coconut lightly in a pan or grill before blending until quite fine in a food processor. Spread half of the coconut out onto a large chopping board and transfer the slab of chocolate to the coconut. Remove the baking paper or foil and sprinkle on the rest of the coconut. Heat the blade of a large knife and cut the chocolate into small squares, re-heating the blade as it cools.
- Store in the refrigerator and consume within a few days and enjoy. Makes a fantastic gift!

You made me smile Charles! I’m so happy I finally could see your creation! Welcome to Nama Chocolate club. I’m forever hooked too. How lucky your friends can get this for Christmas (me included right?). I always admire you for experimenting with different kinds and ingredients. Coconut sounds good idea too, which I never thought of. Thanks for the chocolate advice. I LOVE dark chocolate but I heard milk chocolate is easier to work with. I always pick dark chocolate so I forgot if Royce has different chocolate (milk etc). I have to check it out this year when I go back. But I totally agree about good quality chocolate. That’s what you will be eating so definitely good quality one is necessary. 🙂 Thanks for the kind mention, liking back, and making my day (night) happier!
By the way please allow me to share your post on my fan page…
Thank you Nami – I’m honoured! 🙂
Thank you, Nami, for inspiring Charlie to make me a batch of these for Valentines-day!!! They were absolutely delicious and much nicer than bought chocolates.
You are very welcome! 🙂
Charlie?!!? 🙂 I’m never going to let you live this one down Sir Charles! LOL.
Ha, well actually I think it sounds better than Charles – I’ve always thought Charles sounded so… “regal”. I’ve come to terms with the name over the years, but all my friends used to say I sounded so posh :(.
Hi Nami – I must admit that the first time I made it, using purely your result, the final product was incredible! This time the result was still very tasty – it didn’t last long at all, but it’s difficult to work with white chocolate. I think I will avoid it next time, but it was still tasty so I would recommend it if you ever get a chance. Next time though – I’ll be using plain or milk all the time, and make myself content by using different flavourings and coatings!
I was looking at the ROYCE’ website – they have many incredible varieties… not just plain, milk, and white, but also matcha, and even potato chip flavoured chocolate, haha!
Thank you once again for the inspiration and the source of so many future hand-made Christmas presents which my family and friends will adore! 🙂
Well…if you didn’t get this up in time for Valentine’s Day, it’s perfect for Easter. I just love the chocolate in this and I saw this post on Nami’s blog and have thought every since about making it. Glad to see you have tried it and can recommend it xx
Hi Charlie – really recommend giving it a try… it’s just incredible!
When I read this recipe on Nami’s blog I thought they sounded much like Icy Squares that they sell here; they just melt in your mouth as soon as you put it on your tongue. This recipe sounds so delightful and such a wonderful gift for your wife on Valentine’s Day. I would certainly be very happy with this present. Coconut and chocolate are such a wonderful combo. I’m going to bookmark this for my Christmas Baking next year.
Hope everyone is doing well on your side of the world Charles. Winter has been relentless here, and we are being dumped on with snow, sleet and rain for the last 48 hours, and there doesn’t seem to be an end in sight. The sleet and rain makes the snow so heavy to shovel, it’s unbearable! Right now it’s raining and the snow that fell last night (about 10cm) is soaking it up like a sponge; I can only hope that JT shovels before I get home tonight. Spring can’t come soon enough!
They totally remind me of icy squares too! How funny.
Hi Eva, as I mentioned, I’ll probably not bother with the white chocolate next time. It was a nice touch this time around but it’s too damn unreliable as an addition to baking it seems.
The weather has perked right up here – was so mild last night and looks to be another nice mild day too today 🙂
Mmmm … think I’d pair that lovely combination of flavours with a nice cup of English Breakfast tea!
Hi Jean – I was rather partial to having them with an espresso, but tea would equally work 😉
A fantastic Valentine’s Day gift…how clever of you to make your own chocolates to give to your wife! I need to nudge my husband in that direction. 🙂 I know they’ll make a lot of folks happy at Christmas time, too! If you run out of folks to give these to before you run out of chocolates…add me to your list, will you? 😉
Hi Betsy – I absolutely agree… I couldn’t believe I’d never made these before, they were *that* good. Really hope you get a chance to try them – not sure they’d survive the trip though, in case I had surplus and tried to send it over 😉
OK, Charles, your description of nama chocolate is so good, that it may change the way I look at sweets! 🙂 Having the best ingredients is a key to success. As they say, one can make bad food from good ingredients, but one can never make good food out of bad ingredients. Isn’t that true?! Perfect post!
Hi Marina – it was incredibly good… especially the first batch without the white chocolate. I’d recommend giving that a try first if you do. I like white chocolate, but it’s so unpredictable in cooking and melting so I might skip it next time!
Great recipes propagate themselves from blog to blog and this chocolate confection does seem to be worth making especially since I like coconut rum. I even have a bottle in my china cabinet … 🙂
Hi A_ – the great thing is it’s so customizable… I’ll try whiskey next time I think – and just some dark chocolate… yummy 🙂
Wow how incredibly naughty! I bet that is DAMN good 🙂 But not so good for the figure. But hell, if it’s for a special occasion, I would have one (or maybe 10…!)
Hi Anneli – damn good, absolutely… but you’re absolutely right… not that good at all for the figure! Just sugar and cream, lol 😀
I remember Nami’s chocolates too! Actually now that I think… it’s chocolate ganache that is cut into pieces! So it’s like my chocolate ganache truffles, but differently shaped. I have never thought about it but it’s a great idea to change the shape (and it’s certainly much easier to cut into squares than form truffles…). Chocolate ganache is one of the best inventions in the history of food!
Needless to say, your nama chocolates look fabulous and make me crave for something richly chocolatey. I think I will have a walk to my fridge and take one of the matcha crème brûlées I made two days ago (Nami’s post made me realise I posted them two years ago and hadn’t done them for at least a year!).
I would also use 70% or more cocoa chocolate but not only for the quality: most of all because I love the rich, bitter deep chocolate flavours. I agree about the quality: the thing that should never be bought in supermarkets is the chocolate labelled “for pastry” or something similar. I bought only once (encouraged by a friend…) and spoiled my dessert with it. I will never do this again!
Hi Sissi – indeed, at its core it is ganache, and I quite agree… it’s really one of the best inventions ever! Apparently it was invented by accident when some boy helping his father spilled cream into a big tank of melting chocolate.
Not sure how true this is though but I’m glad someone discovered it 🙂
I hope you will decide to give something like this a try – it’s just wonderful and I think you’d like it a lot. I won’t use white chocolate next time. It’s so unpredictable in cooking and baking. I need something which yields more consistent results!
I’m sure your chocolates were very much appreciated by your lovely wife…a homemade gift is so thoughtful.
Thank you Karen – my wife was a big fan of the chocolate indeed 🙂
This looks so delicious! Maybe I can convince Nami to make me some to try… 😉 Love these flavors, Charles!
Hi Laura – I hope you will get the chance to try them at some point. They’re so incredibly good and moreish! 🙂
Oh I remember these from Nami’s site. They looked good there and they look good here! I’ve got to find some of that nama chocolate. Yes, there is a difference between brands of chocolate and sometimes a BIG difference. Someone gave me chocolate bar the other day from Chile and said it was the best chocolate in the world. NOT! It wasn’t bad, but “the best” – not even close. So I’m still on the hunt for the best! 🙂 Thanks for bringing these bars back to my attention. I’ve got to make them!
Hi MJ – the best chocolate bar in the world from Chile? Hm – I think the chocolatiers of Belgium, Switzerland and France would like a word with whoever decided it was the “best” :D.
I do hope you’ll have a chance to try this because it’s just incredible… creamy, smooth, mmmm!
I remember seeing these beauties on Nami’s site too. Oh, how lovely and naughty are they, but absolutely worth indulging in. It’s true that chocolate quality makes all the difference in desserts, especially when they are all about the underlying flavor of chocolate!
Hi Gourmantine – I do hope you will get a chance to try these. At their basic level they’re not complex at all, but so, so good!
Charles, I cannot think of a better excuse than Valentine’s day to make these irresistible delights!! And they look gorgeous too. (I’m just grateful my husband doesn’t bake – LOL – otherwise this wife would be double her size!!)- I would certainly sign up for these melt-in-your-mouth treats on a special occasion though (I just always have trouble stopping at one with this sort of stuff, you know? The whole moderation things seems to go out the window with one bite ;-)).
Hi Kelly – I think it’s fine to splurge sometimes. As long as one doesn’t make a habit of it. It’s when something like this becomes the “norm” instead of an occasional treat that you know you’re setting yourself up for bad things!
I’m really looking forward to trying other things with this chocolate – maybe some crumbled, freeze-dried raspberries, and whiskey in the chocolate… so much yumminess 😀
Oh there is malibu in the chocolates, yay! =P
I think so I must have missed namis post last year. So glad you had the chance to make them after all! (Luckily I saw them in time too.
You have been to japan? I wish I could go there one day…
Hi Helene, I hope you’ll have a chance to try this – it’s such a smooth, wickedly delicious treat :).
I went to Japan twice in fact, many years ago. It’s a really beautiful country!
Hi there Charles! This recipe looks absolutely delicious… in fact, all of your recipes do! Can’t believe that you’ve managed to develop so many recipes under five Euro; my husband and I are planning to spend six months in Europe next year so I think this will be my go-to source of recipes for treats! I’m an English ex-pat also, but living in Australia. Very different to France but always nice to meet another Brit, wherever we might be living! Following you from now on 🙂
Hi Laura, I’m so sorry I didn’t reply earlier… I thought I had already! Thank you for stopping by, and I’m glad you’re enjoying the look of some of the dishes.
I wonder what life must be like in Australia sometimes… it must be so weird having Christmas in the middle of summer!!
Where will you visit in Europe? Have you decided yet?
Absolutely no problems with the delayed reply… haha, I know far too well that comments can slip away from us (I always worry that I may not have replied to someone, argh!). We’re planning to go to Sweden, Germany, hopefully Italy and anywhere that we can fit in-between. My husband’s family are also Scottish so we’re going to go back and trace some roots there as well 🙂
And yes… Australian Christmases are strange. I’ve been living here for many years now but it still doesn’t feel like Christmas to me; we normally have seafood and try to stay as cool as possible. Last Christmas was 42 degrees C. It was horrible, I felt like I was going to die as my brother and sister-in-law hosted and their house doesn’t have air conditioning. But other than that, Australia is a great country to live in. Lots of fresh food, fresh air and open space. Quite conducive to a healthy lifestyle 🙂
Honestly that looks richly decadent.
Thanks Raymund 🙂