>> Introduction
>> Part 1: Caching
>> Part 2: CDNs
>> Part 3: Asynchronous Loading
>> Part 4: Image Optimization
>> Part 5: Security
>> Round-up and acknowledgements
We’ve now covered caching and distributed content delivery. If you’ve already followed any of my advice, you should be noticing marked increases in your site load times already but there is still more we can do. Many bloggers use social media – it’s a great way to promote your content, meet new, like-minded people and generally build your presence online. Naturally, people like to integrate the various social media elements into their site to allow for easy sharing. “Like” buttons from Facebook, StumbleUpon, Pinterest, Twitter… all these are being loaded from different scripts, which in turn are loaded from the various social networking sites. Now, the problem with these scripts is that if they’re not implemented properly they can have a nasty habit of “blocking” the loading of your site. For example, a script loaded at the wrong section of a page can cause your site to render slowly on the visitor’s computer (or in worst cases block it from rendering at all) until the script has completely finished loading. Since we rely on third-party sites, such as Facebook or Twitter, to serve these scripts, any network problems or delay can cause significant slow-down.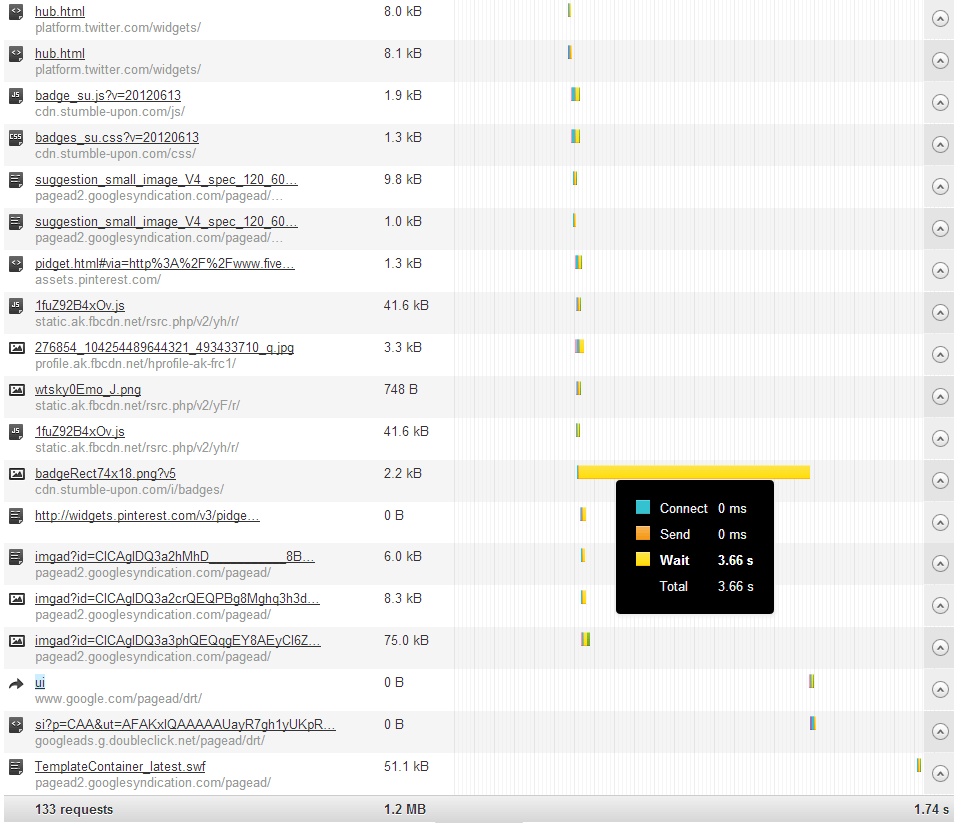
This waterfall chart from Pingdom.com shows a wait time of 3.66 seconds just for a StumbleUpon button alone. On my site I load these elements asynchronously, but if I wasn’t I’d risk delaying the loading of other elements until the StumbleUpon button had finished doing… whatever it was doing.
There are social media plugins which enable you to bulk-install social media buttons as a widget but I would advise against them unless they explicitly say that they load the scripts asynchronously. Unfortunately, even those plugins that do this don’t often include all the social media elements that one would normally like. For example, they might include Facebook and Twitter functionality, but no support for GooglePlus, StumbleUpon, or Pinterest. This is where we must roll up our sleeves and do it ourselves.
Loading scripts asynchronously
So what is asynchronous loading? Well, it’s not just a fancy name:
Asynchronous I/O, in computer science, is a form of input/output processing that permits other processing to continue before the transmission has finished.
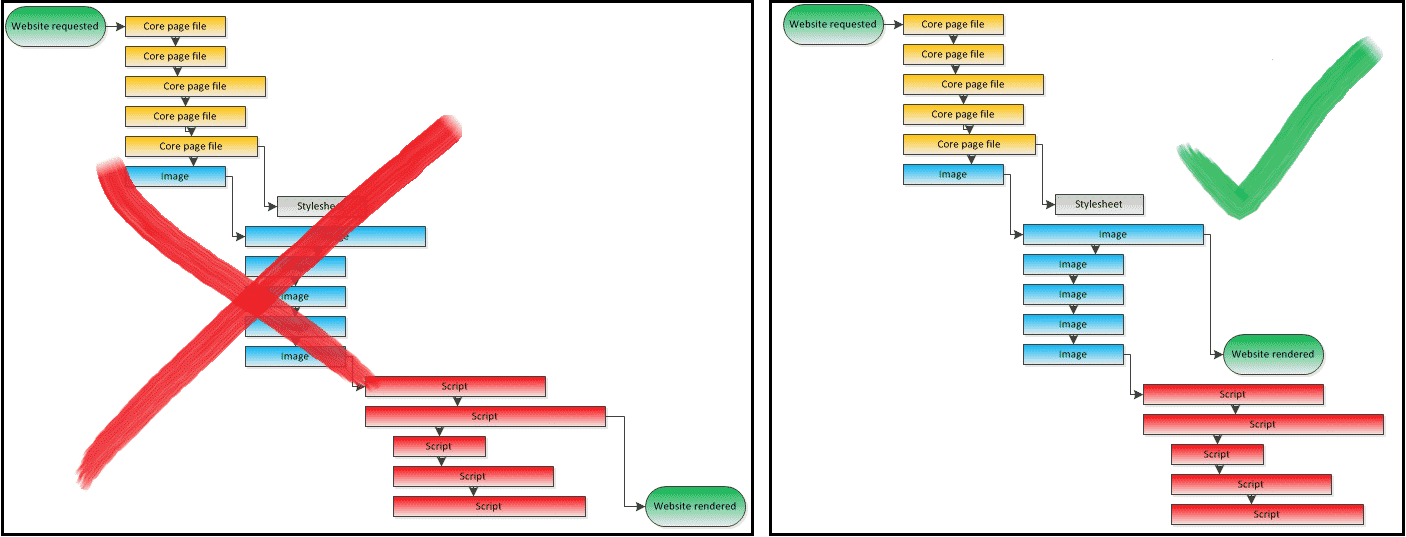
In simple terms, it means that the scripts can be called, and loaded, and everything else can be processed and rendered in the background, completely independently of the scripts. The page will be displayed regardless of whether the Facebook “Like” button is ready, and the button will simply show up on the page as soon as it is ready! What we want to achieve is something similar to the very simplified diagram below, showing an example waterfall chart of a page load. The page can load, the scripts can do their thing in the background and won’t block the page rendering at all.
Digging into the implementation guide for the various social media sites’ buttons and widgets, such as Pinterest’s, here, you’ll see that many offer the code needed to asynchronously load the element (although you might need to hunt around the page a bit before you finally find it). For your convenience I’ve detailed the relevant script snippets you’ll need to implement social media elements for five of the main social networks, as well as where to put them, and how to call them in the guide below:
[tabs slidertype=”left tabs”]
[tabcontainer]
[tabtext]
Where to put the code
[/tabtext]
[tabtext]
Asynchronous Social Media code snippets
[/tabtext]
[tabtext]
Calling the code
[/tabtext]
[tabtext]
Resources and links
[/tabtext]
[/tabcontainer]
[tabcontent]
[tab]
Before modifying any core WordPress or Theme files, always ensure you have a backup of the original file.
 For each of the social media elements that you wish to incorporate on your site, copy the corresponding code on the next tab (code snippets), starting with
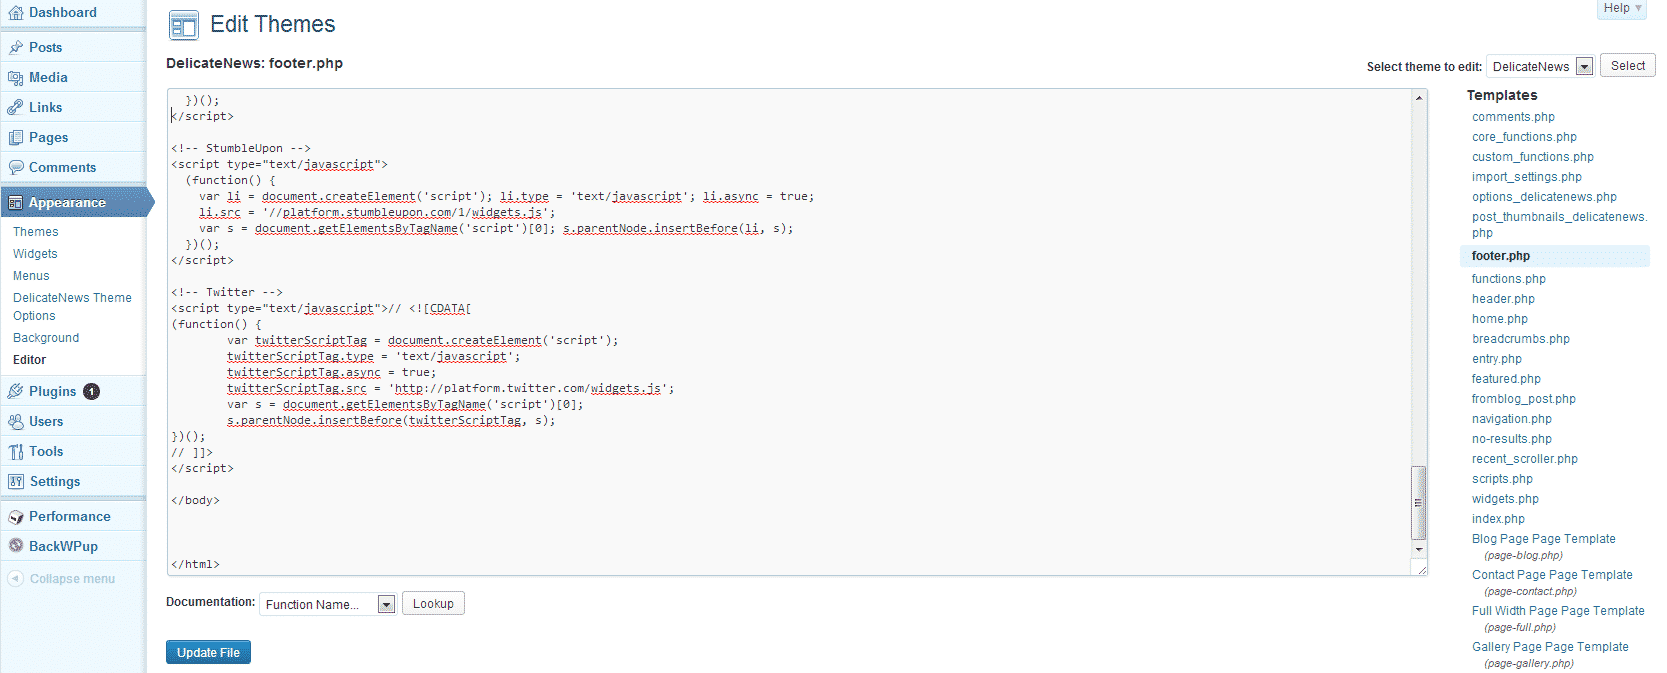
 <script> and ending with </script>. Paste each code snippet into the file in your WordPress theme entitled “footer.php”, at the very bottom of the file, just before the </body> tag. You can edit the footer.php file by selecting “Editor” under “Appearance” in the menu on the left. Once you’ve entered the code snippets, be sure to save the file and empty your page cache (if caching is enabled).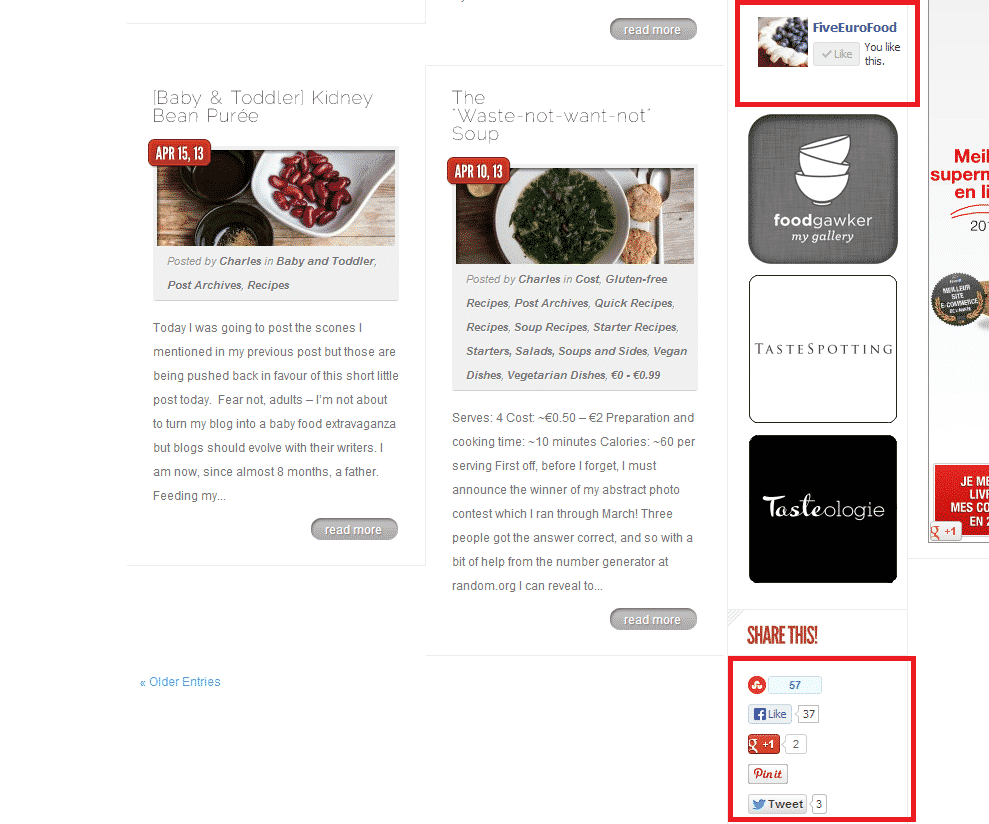
[/tab]
[tab]
[box type=”shadow”]Facebook “Like” box or button:
<div id="fb-root"></div>[/box]
<script>
(function() {
var e = document.createElement('script'); e.async = true;
e.src = document.location.protocol +
'//connect.facebook.net/en_US/all.js#xfbml=1';
document.getElementById('fb-root').appendChild(e);
}());
</script>
[box type=”shadow”]Twitter “Tweet” button:
<script type="text/javascript">// <![CDATA[

(function() {

var twitterScriptTag = document.createElement('script');

twitterScriptTag.type = 'text/javascript';

twitterScriptTag.async = true;

twitterScriptTag.src = 'http://platform.twitter.com/widgets.js';

var s = document.getElementsByTagName('script')[0];

s.parentNode.insertBefore(twitterScriptTag, s);

})();

// ]]>

</script>
[/box]
[box type=”shadow”]StumbleUpon “Submit” button:
<script type="text/javascript">[/box]
(function() {
var li = document.createElement('script'); li.type = 'text/javascript'; li.async = true;
li.src = '//platform.stumbleupon.com/1/widgets.js';
var s = document.getElementsByTagName('script')[0]; s.parentNode.insertBefore(li, s);
})();
</script>
[box type=”shadow”]Pinterest “Pin it” button:
<script type="text/javascript">[/box]
(function(d){
var f = d.getElementsByTagName('SCRIPT')[0], p = d.createElement('SCRIPT');
p.type = 'text/javascript';
p.async = true;
p.src = '//assets.pinterest.com/js/pinit.js';
f.parentNode.insertBefore(p, f);
}(document));
</script>
[box type=”shadow”]GooglePlus “+1 button”:
<script type="text/javascript">[/box]
(function() {
var po = document.createElement('script'); po.type = 'text/javascript'; po.async = true;
po.src = 'https://apis.google.com/js/plusone.js';
var s = document.getElementsByTagName('script')[0]; s.parentNode.insertBefore(po, s);
})();
</script>
[/tab]
[tab]
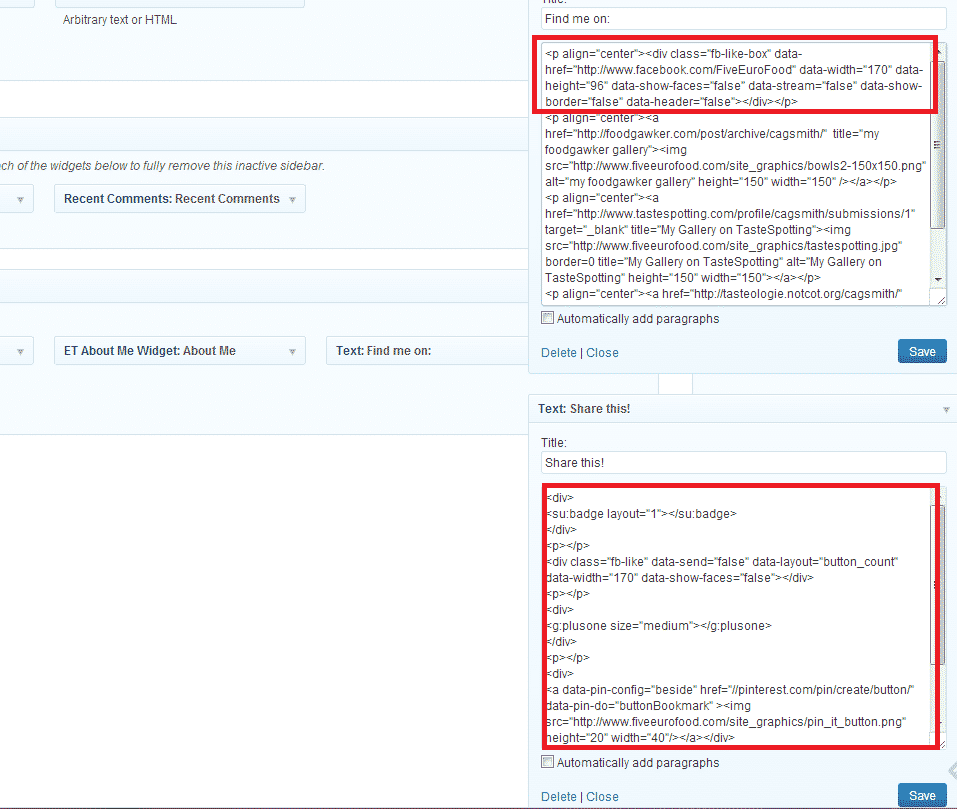 So, you’ve now updated your footer.php and re-built your page cache. You’re ready to start adding the buttons to your site. Because the scripts are now being called asynchronously you can put these wherever you like, though I prefer to have them as a widget in the sidebar (see screenshot).
Quick-start code:
Facebook Like Button (replace FiveEuroFood with your own Facebook page name or ID):<p align="center"><div data-href="http://www.facebook.com/FiveEuroFood" data-width="190" data-height="96" data-show-faces="false" data-stream="false" data-show-border="false" data-header="false"></div></p>[/box]
[box type=”shadow”]Facebook Like Box:
<div class="fb-like" data-send="false" data-layout="button_count" data-width="170" data-show-faces="false"></div>[/box]
<p></p>
[box type=”shadow”]Twitter Tweet Button (replace FiveEuroFood with your own Twitter handle):
<div>[/box]
<a href="https://twitter.com/share" class="twitter-share-button" data-via="FiveEuroFood">Tweet</a>
</div>
<p></p>
[box type=”shadow”]StumbleUpon Submit Button:
<div>[/box]
<su:badge layout="1"></su:badge>
</div>
<p></p>
[box type=”shadow”]Pinterest Pin It Button:
<div>[/box]
<a href="//pinterest.com/pin/create/button/" data-pin-do="buttonBookmark" ><img src="//assets.pinterest.com/images/pidgets/pin_it_button.png" /></a>
</div>
<p></p>
[box type=”shadow”]GooglePlus +1 Button:
<div>[/box]
<g:plusone size="medium"></g:plusone>
</div>
<p></p>
[/tab]
[tab]
<script> </script> tags, since you have already set the required scripts up in the footer.php file, though in rare cases, the javascript may need to be slightly amended (in the case of the StumbleUpon button for example).[/tab]
[/tabcontent]
[/tabs]
Stylesheet, JavaScript, and HTML Minification
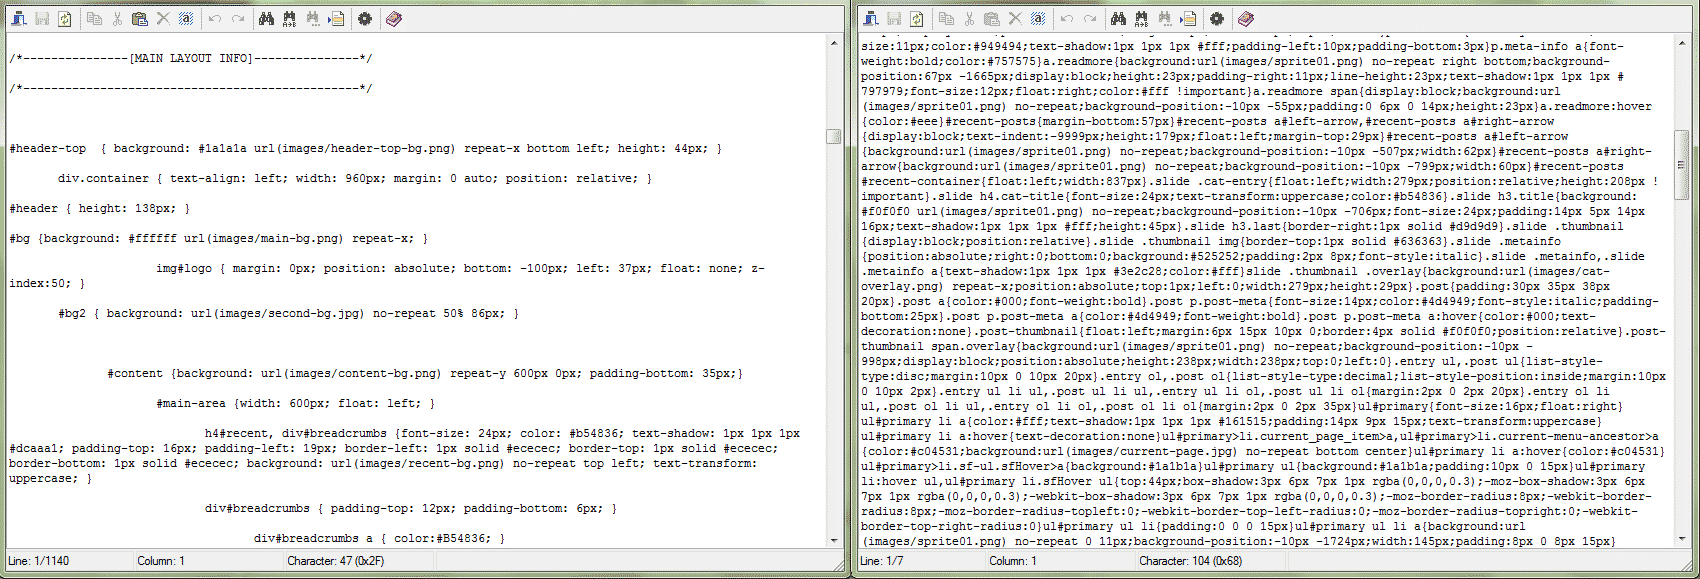
This one’s a no-brainer. Why load, say, 4 files, making 4 requests to the server, when you can load just 1? In many cases, scripts and stylesheets can be combined together into just one file. Not only that, but you know all those spaces and blank lines you see in stylesheets and javascript files? While that certainly makes it easier for humans to read, computers don’t care at all if it’s all “prettied up”. Removing them all can shave valuable time off your page load, and doing it is so simple. If you’re using W3 Total Cache it can be done in mere minutes. Additionally, if you’re using CloudFlare, they also offer an option to automatically minify JS, CSS and HTML files. I prefer to use W3 Total Cache as it offers more control and you can see an example for yourself in the image below. On the left is a screenshot of what my main stylesheet for my site looked like, before minification. On the right is what it looks like now:
I’ve included a brief guide below to help you out with combining and minifying your files using W3 Total Cache.
[tabs slidertype=”left tabs”]
[tabcontainer]
[tabtext]
Activating Minification
[/tabtext]
[tabtext]
Automatic or Manual?
[/tabtext]
[tabtext]
Finishing up
[/tabtext]
[/tabcontainer]
[tabcontent]
[tab]
Before modifying any core WordPress or Theme files, always ensure you have a backup of the original file.
If using automatic minification in CloudFlare, turn if off, otherwise W3 Total Cache will not function. Additionally, activate “Development Mode” in CloudFlare by clicking the cog next to your domain under “My Websites”. This will ensure your changes are visible to you immediately.
[tab]
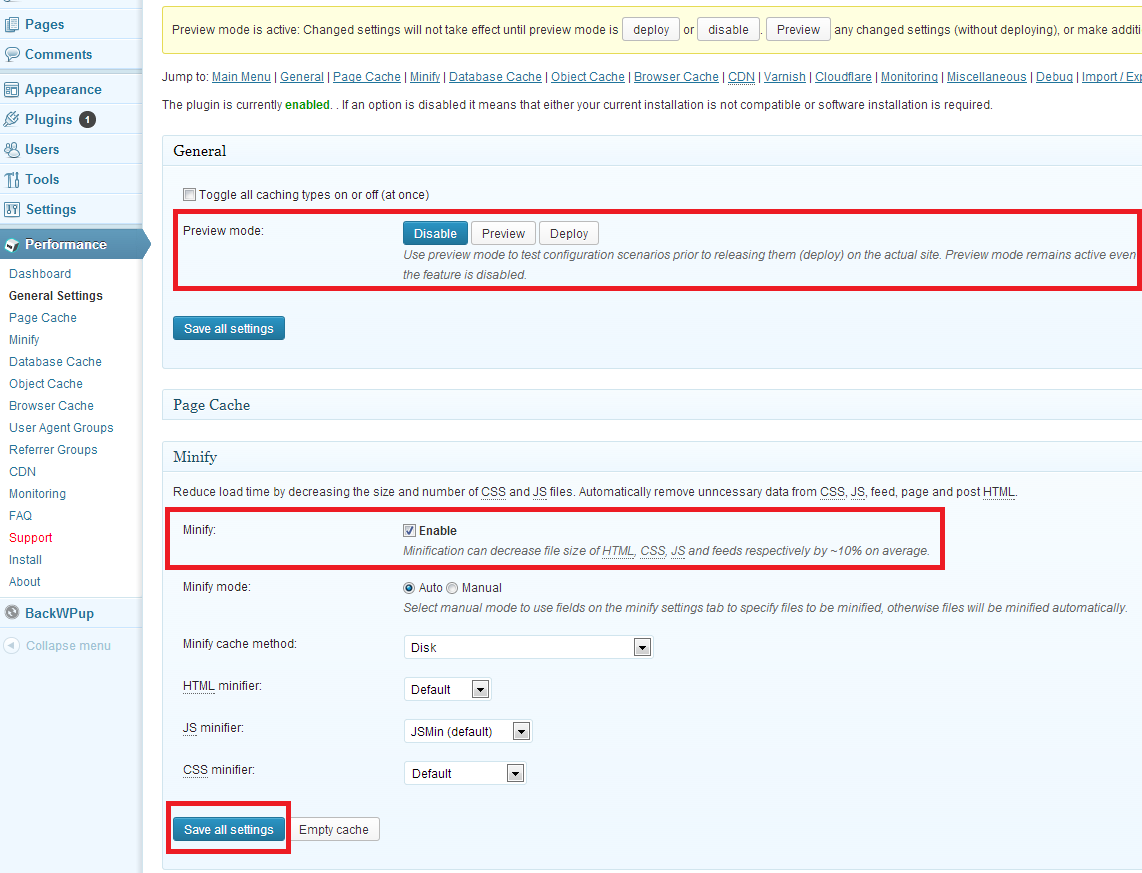
So, should you have all the file combining and minification done automatically? Well – if your site works perfectly after the settings are applied then I would say probably yes. If you’re satisfied that your site works fine then go ahead and click on “Deploy” under “Preview Mode” at the top of the page in W3 Total Cache. If the site seems “broken” then we’re going to have to do it manually, because unfortunately some files don’t really like being mixed together.
Here’s how I do things:
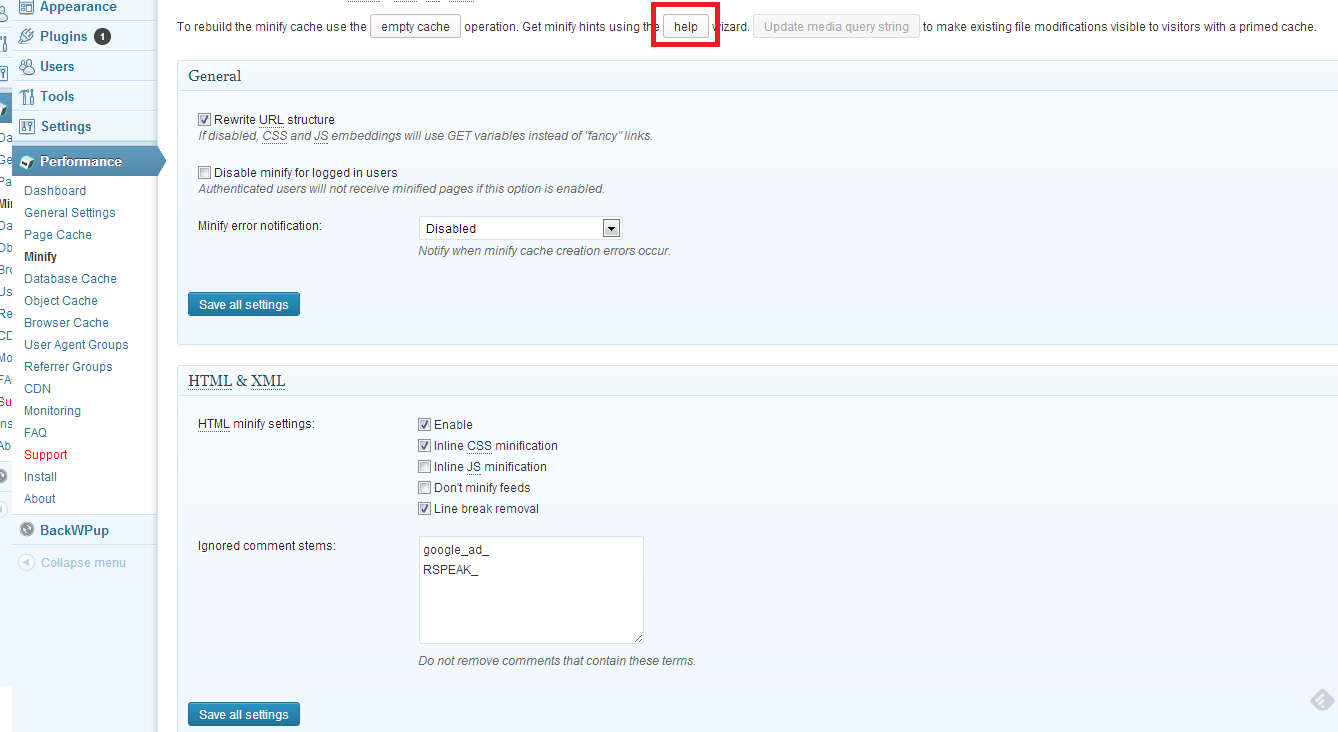
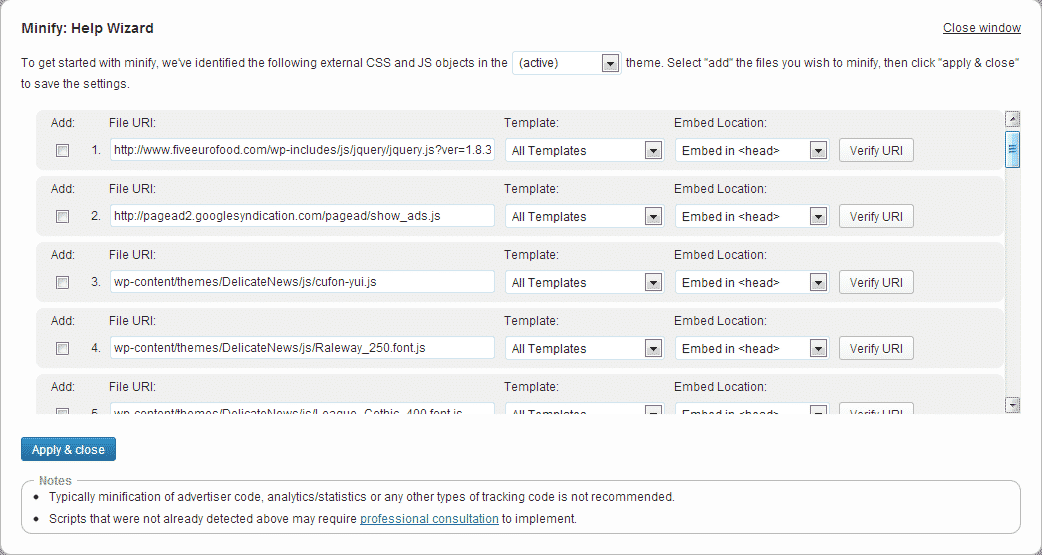 You’ll see a list appear on the screen. The plugin has done its best to detect all scripts and stylesheets in use by your site, as well as guessing where they should be placed in the loading sequence of the page (either in the header, after the page first starts loading, or just before the page finishes loading. First of all, ignore all external scripts. Any scripts related to advertising, tracking, analytics – skip all of these. After that, add one script at a time. Save the changes and then preview the page. If it’s looking ok, add another script. If not, remove the script you just added and then move on to the next one.
Once you’re done with the scripts, move on to the CSS, and then finally you should have a a list of scripts and CSS which will be combined and minimised. Even if it’s just 3 or 4, that’s still better than serving them all up one by one! To tweak the performance, experiment with having the different scripts loaded in different places (either after the <body> or before the </body> tags) – just remember to preview your changes before deploying.
[/tab]
[tab]
[/tab]
[/tabcontent]
[/tabs]
Featured image courtesy of David Castillo Dominici / FreeDigitalPhotos.net
>> Introduction
>> Part 1: Caching
>> Part 2: CDNs
>> Part 3: Asynchronous Loading
>> Part 4: Image Optimization
>> Part 5: Security
>> Round-up and acknowledgements
Wow, you amaze me Charles! These posts are quite enlightening, and one day when I self host I will definitely be using your information.
I had no idea such little things could have such an impact in a blog. The other day I noticed that my menus which used to show up on the right side bar were displaying below and the side bar was filled with previous posts! Chgo John helped me find my issue and thank god it was relatively simple; for my restaurant reviews I usually copy the restaurants address directly from their site and I must have copied in more code than I bargained for. Fortunately I only had two reviews since I noticed the issue. Now I must remember to copy them into word first as plain text, copy again and then paste! Go figure!
Thank you Eva! By the way, I don’t know if you use the browser “Chrome” (instead of Firefox, Internet Explorer etc), but it has a “paste as plain text” option – right click and select it from the menu, or “Ctrl+Shift+V”. It’s very useful sometimes!
I am in awe of your knowledge and research, Charles. Amazing. I just feel that everyday I’m a blogger there’s more and more I need to know xx
Thank you Charlie – there is much that can be done to improve WordPress performance, but it runs pretty well usually on it’s own. Such tweaks are not always necessary – it really depends on your own needs!
I can’t get over how much effort you’ve put in to these posts just to help others. Thanks, Charles!
Thanks Maureen 🙂
Great advice, Charles! Your tips are always so straightforward and helpful :).
Thank you Laura – I hope it comes in helpful to you! 🙂
I know these posts take you a long time so thank you for taking the time to show us! I appreciate it for sure. I need to find a weekend where I can spend some time going through my site with your notes and get it working right. Like you said, WP does pretty well on its own and I think we just leave tend to leave it because of that. I just like to learn new things and so I like the challenge. Thanks Charles! Hope the family is well. We haven’t seen the baby in a while.
Thank you Nazneen – I hope you’re able to apply some of my tips at some point! 🙂 Let me know if you need any clarification on any points!
The family is well thanks – My son just had his MMR vaccine and I have a very cute picture of him sitting waiting in the doctor’s office, hehe :D. I will post a photo again soon – it’s true, it has been a while 🙂
Charles, you are a natural teacher. The time and attention that you have devoted to this series is really impressive. I have been able to pick up bits and pieces even though it doesn’t squarely apply to my situation. I really like the idea of exploring the the technical side of blogging in all of its aspects. If you are open to suggestions for your next techy series 😉 (whenever that may happen), please let me know. Cheers!
Thanks Kelly – I hope you find some parts of it useful :). Did you have something in mind for a series? (It sounds like you have an idea already!) – do let me know! 🙂
Excellent! Here I understood once more everything at first reading! I am amazed at how much work and effort you put into such detailed but useful posts. I don’t have all these buttons (I’m way behind so many bloggers…) but when I finally get my Facebook page etc. I will certainly know where to look for tips. Thanks a lot!
Thanks Sissi – I was worried this post might be the most complex but actually I think my next one will be. I’ve roughly written it so far, but need to properly re-do it so it reads cleanly. In any case, I hope it’s clear for people! After that then I will have the final part which will be a bit easier again 🙂
so informative! You have such great tips and insight into everything
Thanks KB 🙂
I know all of this is vitally important and it is something I am struggling with at the moment… but I just don’t understand. Plus I don’t have a lot of control over anything on my site except content :/
Thank you so much for sharing… at least I know one of the things that is probably slowing my site 🙁
Hi GG – why don’t you have any control over your site? It seems to be a self-hosted WordPress site I think, right? Anyway, I hope you’re able to apply some of my tips – let me know if you need any clarification!
I have been having some script issues in my blog – I am fortunate to have a friend who irons out those issues for me. But it is so good to actually know what to look for and how to go about resolving it and your posts do all that and more. Thank you Charles – I am bookmarking all these gems you are posting and filing them away under one single folder named “Magic Charles WP tips” 😀
BTW, if you get some time, do drop in at my blog.
http://www.thelady8home.com/2013/06/27/duldi/
Thanks Minnie – I hope you’ll be able to find them useful at some point! 🙂
Charles – thank you so much all of this great information! I’m learning so much!
Thanks MJ 🙂
Wow! Again I’m so impressed. Your ability to grasp this stuff is incredible. Not only do I have a hard time understanding the layman’s terms, I can’t imagine the stuff you had to read and know to put it in layman’s terms. By the way, Mr. N is reading over my shoulder and he wanted me to tell you that he likes all the fonts on your site. 🙂
Thanks Kristy – I hope it wasn’t too complex… I tried to make it fairly easy to understand :).
The font – if he means the header/title/section header text then the font is called Raleway Thin (not a typo) – you can download it for free from here and install/use it on your own computer at home if you wanted :).
I wish I have technical knowledge like you do so that I know what’s going on behind blogging. You know me, I rely on my husband a lot… and I don’t even know if he’s doing the right thing. LOL. Thank you for sharing your knowledge. You know that I’m already forwarding your email update to him. 😀
ok I am saving this for later, lots of technical stuff here and better I ll try that out while reading your wisdom Charles. =)